
Chain Garland...
1. Gather your supplies! Paper, Scissors, Glue, Stapler and Tape.

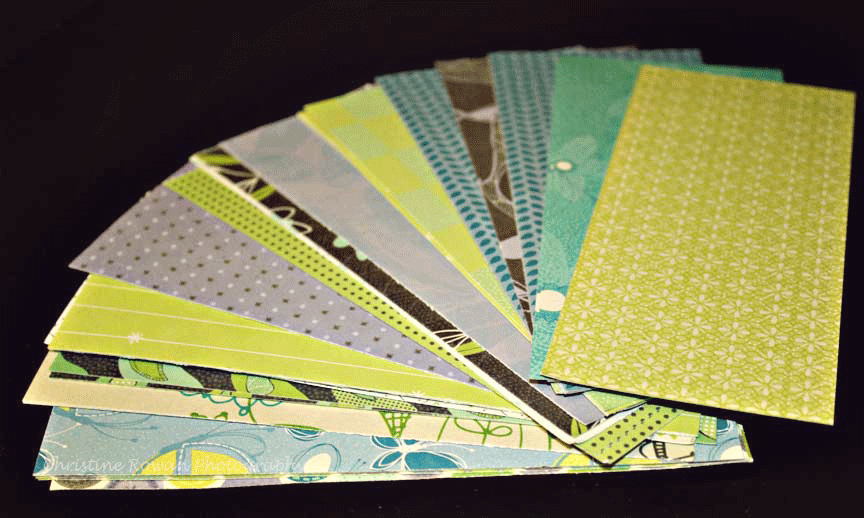
2.. The first step is picking out the paper. The paper can be any color, style or design. First you cut the paper into the size you want whether it be small or big. I choose to do my chain link about 2 inches wide and 10 inches long.
3. The third step is optional, but I think it adds some extra flair to the chain link garland. What you want to do is find some funky scissors that cut different edges and cut along both sides of the paper (on the 10 inch side).

4. After cutting the sides of the paper you are going to take a piece and pull the ends together to create a circle. There are several different ways to secure the first link together, from tape to glue to staples. I have tried all three ways and they all work great, so it is just a personal preference. After the first is complete you will continue this to the rest for however long you want the chain to be.

5. The final step is hanging the garland, you can hang it straight up and down or across a table, then you're finished!


Star Garland...
I heart star garland, which is why I used it our wedding. I decided to use music sheet paper, because my Husband is a musician. Check it out below...
.jpg) |
| Photo Credit: Beth Armsheimer Photography |

2. Next you want to fold the paper into accordions.

3. In step three you want to staple the accordion closed so it is easier to work with.

4. After stapling the center of your accordion you cut the ends into triangles with points facing out. (If you want you can get creative with this part using funky scissors or cutting different shapes on the ends.)


5. Next you want to fold the accordion in half, so it is easier to bend. After that you want to open it up and staple the ends together on both sides.

6. After you have stapled both ends so it looks like a star you will take a hole punch and punch two consecutive holes, so you can slide the string, lace, yarn, etc. through each star.

7. The last and final step is stringing the star garland. It can be strung on any type of string you choose and can be as long as you decide.


What are some of your favorite DIY projects? Is there a project you would like to know how to do? Let me know your thoughts.
XOXO
Christine
* All projects created on Make It Yourself Monday, can be made for your wedding/party in your choice of colors, sizes and styles. Send me an email at PurplePeacockWeddings@gmail.com with your information and requests, and I will get back to you asap : )
Hi friend! Love the garland ideas! Check out the garland for fall on www.tatertotandjello.blogspot.com
ReplyDelete